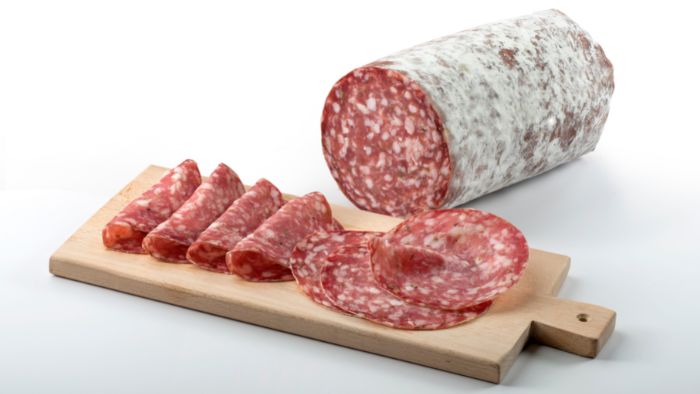

This recipe is taken from Paul Thomas' Book, 'Home Charcuterie'. It is full of fantastic recipes like this one, giving you simple step-by-step instructions to ensure you get it right the first time around. The book has a selection of recipes including salami, sausages, bacon, pates, terrines and other cured meats.
Finocchiona is a famous fennel-rich salami, made in Tuscany where there is an abundance of wild fennel. It is quite a soft salami, quite unlike the hard texture of salami that many people are familiar with. This is because this salami is not cured for very long.
Our recipe takes its influence from this salami, giving a pleasant, fresh-tasting cured meat with a food distribution of finely-cut fat.
LEVEL: ADVANCED
PREP TIME: 1 Hour
Cure Time: 3 - 4 weeks
INGREDIENTS
MEAT
Pork shoulder 600g/1lb 3oz
Pork back fat, weighing 400g/14oz
SEASONING & CURE
0.5g Bactoferm T-SPX Salami Culture
Curing Salt #2, 2.5g 1/16th oz per 1kg/2.2lb of meat. Optional (this must be measured accurately for the exact quantity of meat being used.
21g 3/4oz PDV salt or fine salt
1.8g 1/16oz sugar
5g Fennel Seeds.
2.5g coarsely ground pepper
2 cloves garlic crushed
30ml/ 2tbsp dry white wine
A pinch of Mold 600 (Penicillium nalgiovenese mould culture).
CASINGS
5cm/2in Fibrous Casings
A pinch of Mold 600 (Penicillium nalgiovenese mould culture).
METHOD
1. Soak the fibrous salami casings in water for half an hour before filling it. Weigh out the pork shoulder and back fat, before chipping them into evenly sized chunks small enough to fit into the mincer. If you like, you can place the chopped meat and fat in the freezer for 5-10 minutes before mincing it, to help make it firmer and easier to handle.
2. Mince the pork shoulder and back fat through an 8mm plate. Alternate between the fat and lean meat when mincing as it will make them easier to combine.
3. Dissolve the starter culture into a tablespoon of water and sprinkle it over the meat.
4. If using salt, weigh it out very carefully. Add it to the PDV salt and make sure that it is thoroughly mixed. Add the salt mixture, sugar, fennel, black pepper and crushed garlic to the meat and add the dry white wine.
5. Mix everything in very well, as it is essential that all the salt is evenly distributed.
6. After mixing, pack the salami ingredients into a sausage stuffer. A tablespoon of the mixture can be reserved as a sample and kept alongside the salami to be used to monitor pH development during the fermentation.
7. Roll the casing over the end of the nozzle and begin to fill it, excluding as much air as possible.
8. Tie the end of the casing twice with a length of butcher’s string to seal the salami. It is important to exclude as much air as possible or it could allow the tip of the salami to become mouldy.
9. Dissolve the Mould 600 (Penicllium Nalgiovense) in a few tablespoons of clean water and rub it gently on the surface of the salami using a very clean or gloved hand. Record the weight of the salami so that moisture loss during drying can be calculated.
10. The salami should be dried at 24°C/75.2℉ for 3 days. Avoid fluctuations in temperature where possible. Humidity should be maintained at 80-90% with gentle air circulation. Monitor the temperature regularly by testing the sample. A steady temperature should be maintained during fermentation and the pH should come down to 5.30 by the end of this time.
11. Once the fermentation is complete, hang the salami at 12-15℃ / 53.6 – 59 ℉. It should be dried until it loses around 30% of its initial weight and this may take several weeks. Using some vinegar, rub off any unwanted rogue moulds, other than the white penicillium nalgiovense, that form on the rind.
Weschenfelder Top Tip: Once dried and ready to eat, the casing should be peeled off as far as required to slice. Slice the salami as finely as possible using a sharp knife or meat slicer. The cut face can be covered with clingfilm or good wrap to stop it from drying.

